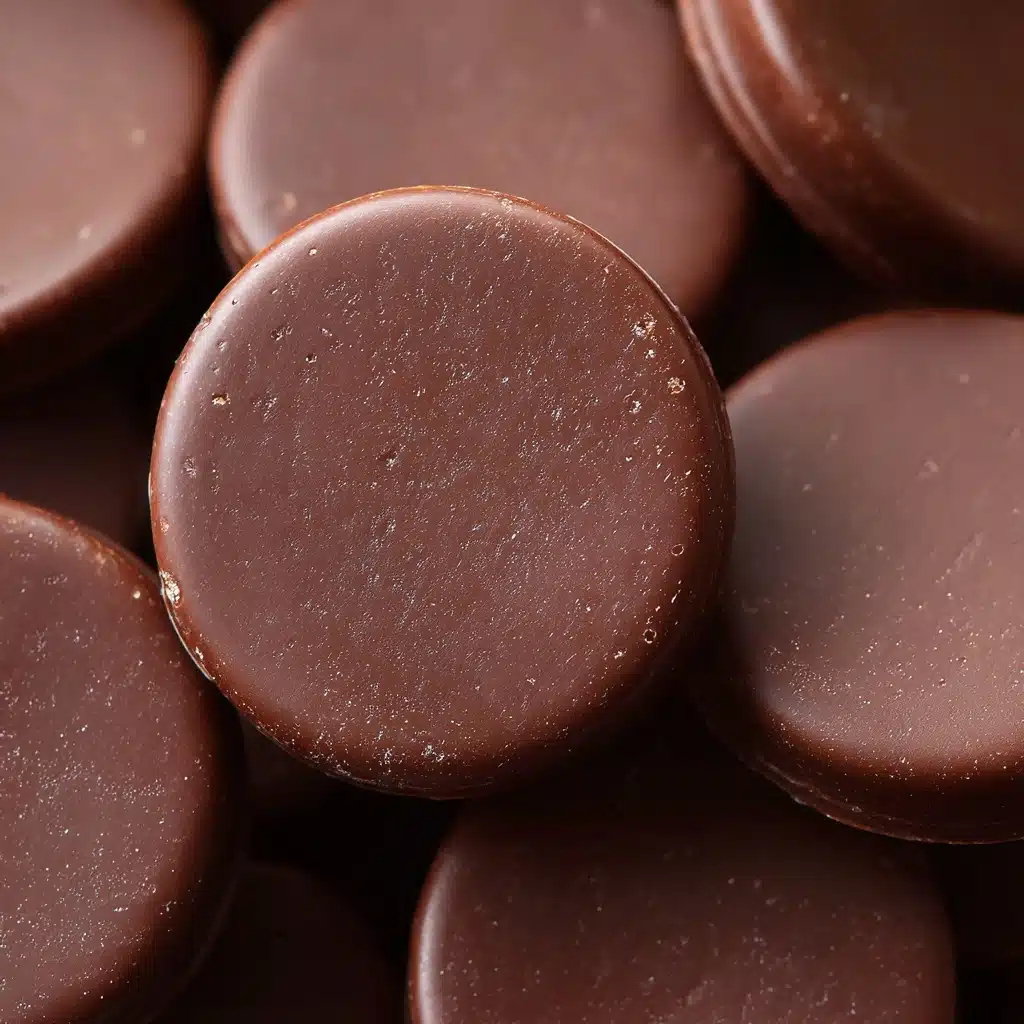
If you’ve ever found yourself wishing Girl Scout cookie season lasted all year, you’re in luck—the Perfect Homemade Thin Mint Cookies are here to thrill your taste buds! These cookies combine a crisp, chocolatey base with a refreshing peppermint kick, all wrapped up in a luscious layer of silky dark chocolate. The fragrance of mint fills your kitchen as they bake, and every bite is as snappy and exhilarating as the next. With this easy-to-follow recipe, you’ll discover just how simple it is to recreate that iconic treat at home, whenever the craving strikes.

Ingredients You’ll Need
Don’t let the short ingredient list fool you—each component plays a starring role in achieving those famous flavors and textures. From rich cocoa to cool peppermint extract, you’ll see just how each ingredient helps build the magic of Perfect Homemade Thin Mint Cookies.
- All-purpose flour: Provides the structure and delicate crispness for that classic cookie crunch.
- Unsweetened cocoa powder: Gives a deep, chocolatey essence that’s true to the original Thin Mints.
- Baking powder: Ensures a subtle lift, so the cookies aren’t too dense.
- Salt: Balances sweetness and intensifies all those gorgeous chocolate and mint notes.
- Unsalted butter (softened): Delivers buttery richness and a melt-in-your-mouth texture.
- Granulated sugar: Sweetens every bite just the right amount.
- Egg: Binds the dough for the perfect tender crumb.
- Vanilla extract: Adds a warm depth, enhancing both the chocolate and mint.
- Peppermint extract: The essential ingredient for that cool, refreshing finish.
- Semisweet or dark chocolate chips: Melts to a silky coating, adding that beautiful snap when you take a bite.
- Peppermint extract (for coating): Doubles down on the minty flavor in the final chocolate dip.
How to Make Perfect Homemade Thin Mint Cookies
Step 1: Gather and Prepare Your Ingredients
Making Perfect Homemade Thin Mint Cookies starts with a little prep work. Set out all your ingredients and let the butter come to room temperature. Line a baking sheet with parchment paper, ensuring your cookies bake evenly and come off the pan effortlessly.
Step 2: Whisk the Dry Ingredients
In a medium bowl, whisk together the flour, unsweetened cocoa powder, baking powder, and salt. This quick step prevents any lumps and guarantees that the leavening is evenly distributed for every single cookie.
Step 3: Cream Butter and Sugar
In a separate bowl, cream the softened butter and granulated sugar together until the mixture is light and fluffy. This not only aerates the dough for a perfectly crisp texture but also helps create that deliciously rich cookie base.
Step 4: Add the Egg and Extracts
Beat in the egg, then add both vanilla and peppermint extracts. Your kitchen will instantly smell like chocolate-mint heaven—these extracts are key to building those iconic Thin Mint layers of flavor.
Step 5: Combine and Chill the Dough
Gradually add your dry ingredients to the creamed mixture, mixing just until a smooth dough forms. For the best texture, divide the dough in half and wrap each portion in plastic wrap. Chill in the refrigerator for 30 minutes; this makes rolling and cutting so much easier.
Step 6: Roll and Cut Out Cookies
After chilling, dust your work surface lightly with flour and roll each dough portion out to about 1/4-inch thickness. Use a 2-inch round cutter for that classic shape, then transfer the cookies to your parchment-lined baking sheet. Each circle soon becomes a bite of nostalgia!
Step 7: Bake Until Crisp
Bake the cookies for 10 to 12 minutes at 350°F (175°C) until they feel dry to the touch and just slightly firm. If you adore that extra crunch, feel free to bake them an additional 1 to 2 minutes. Once baked, transfer to a wire rack and let them cool completely—the next step requires totally cooled cookies for perfect dipping.
Step 8: Melt and Flavor the Chocolate Coating
In a microwave-safe bowl or using a double boiler, melt your chocolate chips until smooth and glossy. Stir in peppermint extract—now you’ve got that crave-worthy combo ready to drizzle and dip!
Step 9: Dip and Set the Cookies
Dip each cooled cookie into the melted chocolate, ensuring a complete, even coating. Place the dipped cookies back onto parchment paper and pop them into the fridge for 15 to 20 minutes so the chocolate hardens with that irresistible glossy finish.
How to Serve Perfect Homemade Thin Mint Cookies

Garnishes
These cookies shine on their own, but for a little extra sparkle, try topping them with a sprinkle of crushed peppermint candies or a dusting of cocoa right before the chocolate sets. The added texture and color make your Perfect Homemade Thin Mint Cookies visually irresistible and just a little more festive.
Side Dishes
For an elevated dessert spread, pair your cookies with a scoop of vanilla bean ice cream, a mug of creamy hot chocolate, or even an affogato if you’re feeling indulgent. Their intense minty flavor is the perfect counterpoint for creamy, mellow sides.
Creative Ways to Present
Stack your Perfect Homemade Thin Mint Cookies in clear cellophane bags tied with green ribbons for edible gifts, or layer them on a cake stand for a party centerpiece. You can even include them on a holiday cookie platter or use as a base for homemade thin mint ice cream sandwiches!
Make Ahead and Storage
Storing Leftovers
Keep your leftover cookies fresh by storing them in an airtight container at room temperature for up to a week. The chocolate coating keeps them crisp and flavorful, making it easy to sneak a snack whenever the mood hits.
Freezing
Perfect Homemade Thin Mint Cookies are perfect freezer candidates! Once set, layer them between sheets of parchment in an airtight container or zip-top bag. Freeze for up to two months—some would say they taste even better straight from the freezer, just like the originals.
Reheating
These cookies don’t require reheating, but if you crave a freshly-baked aroma, you can let them sit at room temperature for a few minutes or zap them in the microwave for 5-10 seconds (just until the chocolate softens a touch).
FAQs
Can I use Dutch-processed cocoa powder instead of natural cocoa powder?
Yes, you can substitute Dutch-processed cocoa—this will give the cookies a slightly richer, darker flavor and color. Just keep in mind the finished cookies may have a subtly different chocolate profile, but they’ll still be delicious.
What’s the secret to getting a super snappy texture?
The classic Thin Mint snap comes from rolling the cookies thin, chilling the dough well, and not overbaking. You can also bake them a minute or two longer for extra crunch if you love that shattering bite!
Can I make these gluten-free?
Absolutely! Swap the all-purpose flour for your favorite gluten-free 1:1 baking blend. Just check that your blend contains xanthan gum for the best texture—and taste test as you go.
Is there a way to make these vegan?
To make vegan Perfect Homemade Thin Mint Cookies, use a plant-based buttery spread, a flax egg (1 tablespoon ground flaxseed mixed with 2.5 tablespoons water), and dairy-free chocolate chips. Check all extract and cocoa brands to ensure they’re entirely plant-based.
Can kids help with this recipe?
Kids will have a blast rolling out the dough, cutting shapes, and dipping cookies in chocolate! Adult supervision is recommended for handling the chocolate and hot oven, but children can definitely join in for most of the steps and decorating.
Final Thoughts
If you love a good chocolate-mint treat, don’t miss out on making these Perfect Homemade Thin Mint Cookies. They’re nostalgic, crisp, and loaded with real ingredients you can pronounce. Gather your favorite people, share a plate, and enjoy the bliss of Thin Mints any time of year!
Print
Perfect Homemade Thin Mint Cookies Recipe
- Total Time: 42 minutes (plus chilling and setting time)
- Yield: 24 cookies 1x
- Diet: Vegetarian
Description
Indulge in the delight of these perfect homemade Thin Mint cookies. A rich cocoa dough infused with peppermint, dipped in dark chocolate, these treats are a delightful blend of sweetness and minty freshness.
Ingredients
Dough:
- 1 cup all-purpose flour
- ½ cup unsweetened cocoa powder
- ½ teaspoon baking powder
- ¼ teaspoon salt
- ½ cup unsalted butter (softened)
- ½ cup granulated sugar
- 1 egg
- ½ teaspoon vanilla extract
- ½ teaspoon peppermint extract
Coating:
- 10 oz semisweet or dark chocolate chips
- ½ teaspoon peppermint extract (for coating)
Instructions
- Preheat the oven: Preheat to 350°F (175°C) and line a baking sheet.
- Prepare the dough: Whisk flour, cocoa, baking powder, and salt. Cream butter and sugar, add egg, vanilla, and peppermint extract. Mix in dry ingredients.
- Chill and cut: Chill dough, roll out, cut into circles, and bake.
- Coat in chocolate: Melt chocolate chips, stir in peppermint extract. Dip cookies, let set.
- Set and serve: Refrigerate to harden chocolate before enjoying.
Notes
- For extra crunch, bake longer.
- Store cookies in the freezer for an authentic experience.
- Prep Time: 30 minutes
- Cook Time: 12 minutes
- Category: Dessert
- Method: Baking
- Cuisine: American
Nutrition
- Serving Size: 1 cookie
- Calories: 140
- Sugar: 10g
- Sodium: 45mg
- Fat: 8g
- Saturated Fat: 5g
- Unsaturated Fat: 2.5g
- Trans Fat: 0g
- Carbohydrates: 16g
- Fiber: 1g
- Protein: 1g
- Cholesterol: 15mg


