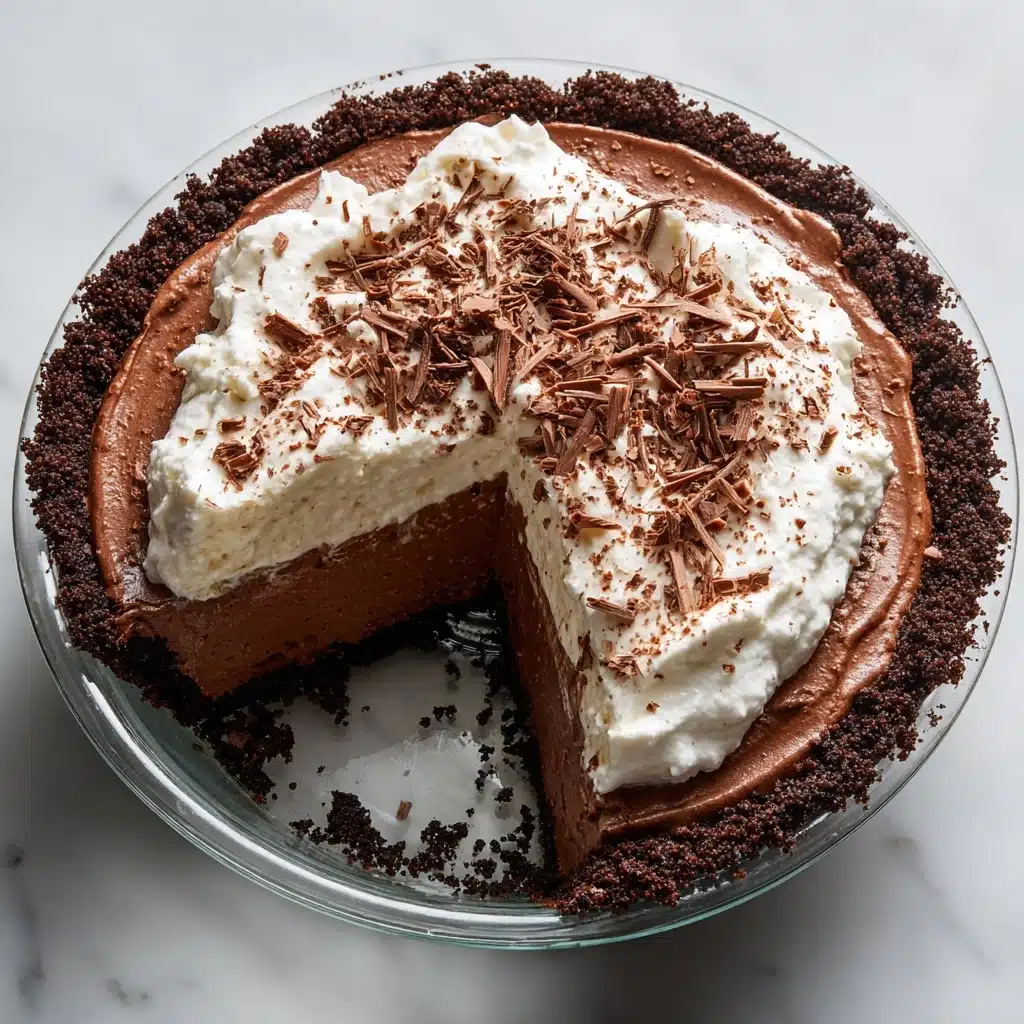
If you’re searching for the ultimate quick dessert that will have everyone raving, let me introduce you to the No Bake Chocolate Pudding Pie. This crowd-pleasing sweet treat is as effortless as it is indulgent, combining the silky richness of chocolate pudding with clouds of whipped topping, all nestled in a buttery graham cracker crust. The best part? No oven required! Whether it’s a last-minute dinner party or a cozy night at home, this pie turns any occasion into something special with its cool, creamy texture and irresistible chocolate flavor. Give it a try and watch it disappear slice by slice!
Ingredients You’ll Need
-
Graham Cracker Crust:
- 1 prepared 9-inch graham cracker crust
Chocolate Pudding Filling:
- 1 (3.9 oz) box instant chocolate pudding mix
- 1 1/2 cups cold milk
- 1 cup whipped topping (like Cool Whip)
Topping:
- 1 1/2 cups additional whipped topping
- Chocolate shavings or curls for garnish (optional)
How to Make No Bake Chocolate Pudding Pie
Step 1: Whisk the Chocolate Pudding
Start by grabbing a large mixing bowl and whisk together the chocolate pudding mix with your cold milk. Whisk it for about 2 minutes—the texture should turn thick and glossy. Using cold milk really helps the pudding set up quickly and smoothly, so don’t skip the chill!
Step 2: Fold in the Whipped Topping
Once your pudding is thick, gently fold in 1 cup of whipped topping. Take your time with this—use a rubber spatula to combine with a soft, sweeping motion. This keeps all that lovely air in the mixture, turning it ultra-creamy without losing volume.
Step 3: Assemble the Pie
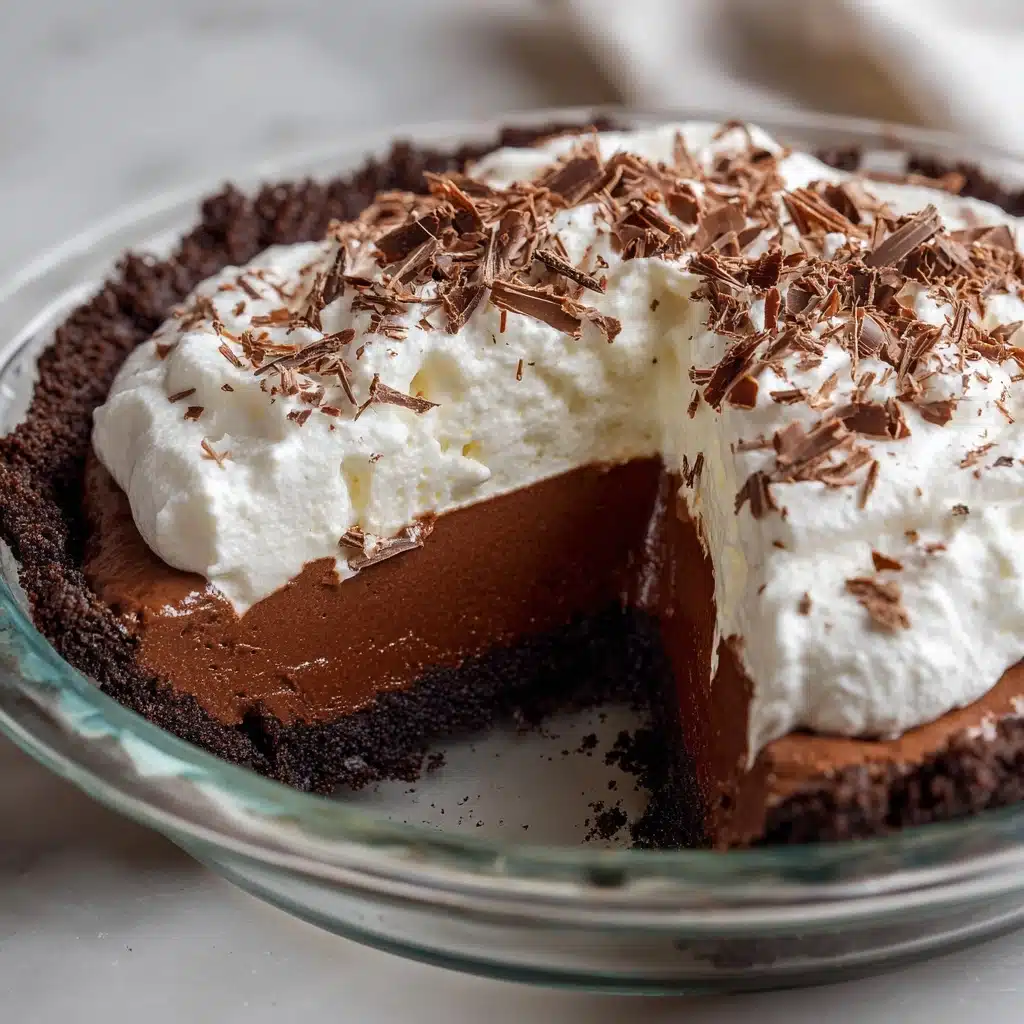
Spoon your dreamy chocolate filling into the prepared graham cracker crust. Spread it out evenly, making sure to nudge it all the way to the edges. Use an offset spatula if you want a super-smooth surface, but don’t stress—rustic swirls are beautiful too!
Step 4: Chill to Set
Pop the whole pie into the refrigerator for at least 3 hours (overnight is fine too). This important nap lets the flavors meld and the filling firm up perfectly for clean, picture-worthy slices.
Step 5: Add Whipped Topping & Garnish
Before serving, heap the remaining whipped topping over the filling. Add chocolate shavings or curls for a stunning finish that’ll make your pie look bakery-made. Now you’re ready to slice and serve!
How to Serve No Bake Chocolate Pudding Pie

Garnishes
Bringing out your No Bake Chocolate Pudding Pie calls for a fun finishing touch! Chocolate shavings or curls make for a glam topper but don’t be shy about using mini chocolate chips, a drizzle of fudge, or even a sprinkle of flaky sea salt. For a pop of color, scatter on fresh raspberries or sliced strawberries—bold and beautiful!
Side Dishes
This pie is dreamy on its own, but if you want to go the extra mile, pair slices with a tall glass of cold milk or a rich mug of coffee. For a fancy dinner party, try a scoop of vanilla bean ice cream or a fresh fruit salad alongside to balance the chocolatey richness.
Creative Ways to Present
You can give your No Bake Chocolate Pudding Pie a personal twist: assemble individual mini pies in mason jars, parfait glasses, or tiny tart shells. Layer some whipped topping and extra cookie crumbs for a trifle-style dessert that’s cute and totally shareable. For holidays, add decorative chocolate shapes or even festive sprinkles!
Make Ahead and Storage
Storing Leftovers
Leftover slices keep beautifully in the fridge! Cover your No Bake Chocolate Pudding Pie loosely with plastic wrap or store in an airtight container for up to 3 days. The crust stays crisp and the filling keeps its lush texture, so you’ll enjoy every bite even on day three.
Freezing
If you want to make this pie well in advance, it freezes surprisingly well. Wrap the pie tightly with plastic wrap and then with foil, and freeze for up to one month. When you’re ready to enjoy, transfer it to the fridge and let thaw overnight for the best texture.
Reheating
No reheating required! This dessert is meant to be served cold, straight from the refrigerator. If you’ve frozen it, simply allow enough time for it to fully soften in the fridge before slicing. That’s it—no oven ever needed.
FAQs
Can I use homemade whipped cream instead of store-bought whipped topping?
Absolutely! Freshly whipped cream works beautifully and adds a touch of homemade love. Just be sure to whip it stiff enough to hold up in the pie, and use slightly sweetened cream for the perfect complement to the chocolate.
What kind of milk works best for the pudding?
Whole milk creates the richest, creamiest texture for your pudding, but any cold dairy milk will set up the instant mix just fine. Avoid milk alternatives for this recipe, as they might not let the pudding thicken properly.
Can I make No Bake Chocolate Pudding Pie gluten free?
Yes! Simply use a gluten-free graham cracker crust and double-check your pudding mix for any hidden gluten. All other ingredients are generally gluten-free, so it’s an easy swap.
How far ahead can I make this pie?
This pie is the definition of make-ahead! You can prep it up to 24 hours in advance and keep it chilled in the fridge until you’re ready to serve. Just add the final whipped topping and garnish right before serving for the best look and taste.
Is there a way to make this pie extra chocolatey?
If you’re a true chocoholic, substitute chocolate fudge pudding mix and use a chocolate cookie crust. You can also sprinkle in mini chocolate chips between the layers or drizzle melted chocolate over the topping for maximum chocolate decadence.
Final Thoughts
This No Bake Chocolate Pudding Pie is about to become your go-to sweet fix for every season and celebration. Whether you’re a seasoned baker or just starting out, you’ll love how easy, quick, and impressive this pie is. Share it with friends, family, or anyone who needs a little chocolate joy—just don’t be surprised when they ask for the recipe!
Print
No Bake Chocolate Pudding Pie Recipe
- Total Time: 3 hours 10 minutes (including chill time)
- Yield: 8 servings 1x
- Diet: Non-Vegetarian
Description
Indulge in the rich and creamy delight of a No Bake Chocolate Pudding Pie. This easy dessert is a perfect treat for any chocolate lover.
Ingredients
Graham Cracker Crust:
- 1 prepared 9-inch graham cracker crust
Chocolate Pudding Filling:
- 1 (3.9 oz) box instant chocolate pudding mix
- 1 1/2 cups cold milk
- 1 cup whipped topping (like Cool Whip)
Topping:
- 1 1/2 cups additional whipped topping
- Chocolate shavings or curls for garnish (optional)
Instructions
- Prepare Pudding: In a large bowl, whisk together the chocolate pudding mix and cold milk until thickened.
- Combine with Topping: Gently fold in 1 cup of whipped topping until smooth and creamy.
- Fill Crust: Pour the pudding mixture into the graham cracker crust and spread evenly.
- Chill: Refrigerate for at least 3 hours until set.
- Top and Serve: Before serving, top with the remaining whipped topping and garnish with chocolate shavings. Slice and serve chilled.
Notes
- For a richer flavor, use chocolate fudge pudding or top with mini chocolate chips.
- You can also use a chocolate cookie crust instead of graham cracker for extra chocolate goodness.
- Prep Time: 10 minutes
- Cook Time: 0 minutes
- Category: Dessert
- Method: No-Bake
- Cuisine: American
Nutrition
- Serving Size: 1 slice
- Calories: 260
- Sugar: 18g
- Sodium: 300mg
- Fat: 13g
- Saturated Fat: 6g
- Unsaturated Fat: 6g
- Trans Fat: 0g
- Carbohydrates: 33g
- Fiber: 1g
- Protein: 2g
- Cholesterol: 5mg
