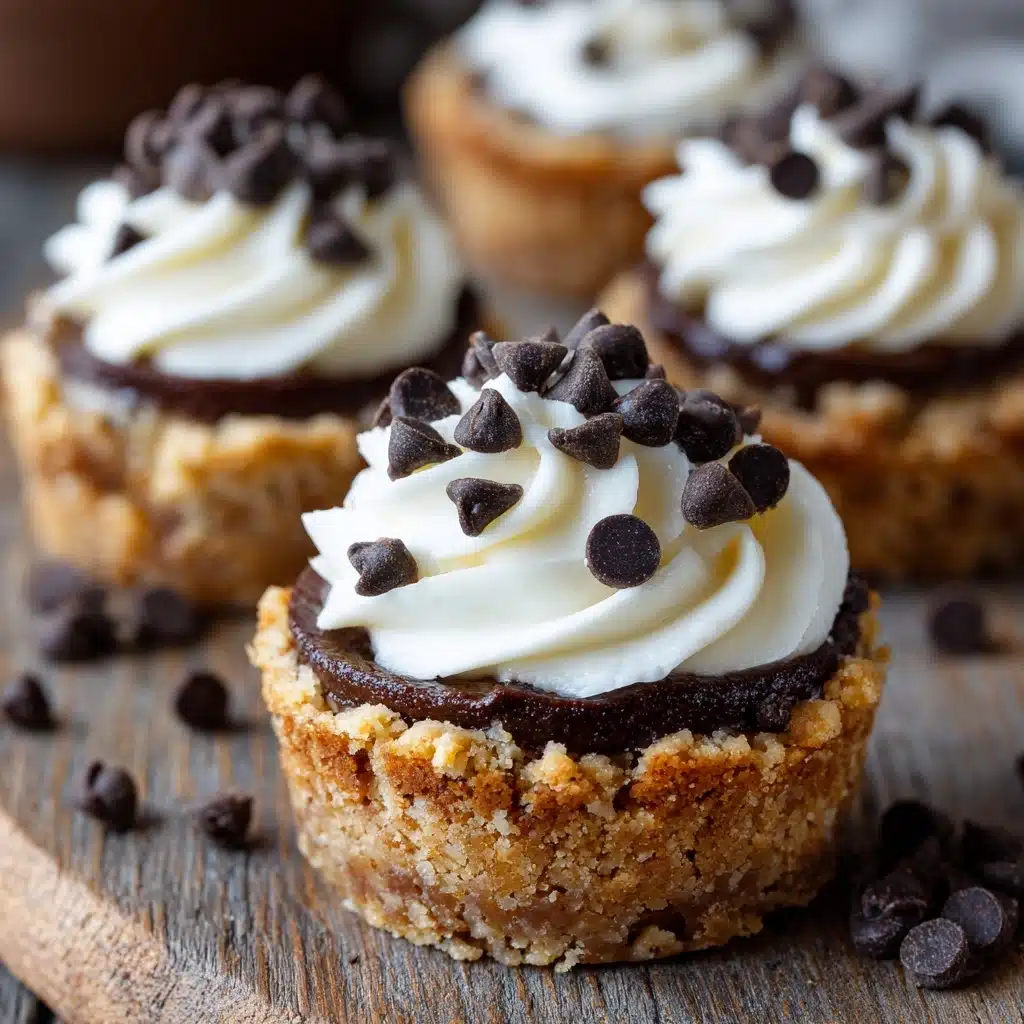
Cannoli Cookie Cups are everything you love about classic Italian cannoli but in a playful, bite-sized cookie form that’s just as beautiful as it is delicious. Each buttery cookie cup holds a dreamy ricotta-mascarpone filling flecked with chocolate chips, making every bite a celebration of creamy, crunchy, and sweet. These little gems are perfect for parties, holidays, or just because you want to treat yourself to something truly special. If you’ve never made homemade cannoli before, don’t worry—this recipe is simple, satisfying, and sure to impress anyone lucky enough to snag one!
Ingredients You’ll Need
Ingredients You’ll Need
The ingredient list for Cannoli Cookie Cups is refreshingly short, but don’t let that fool you—each element is essential for creating those classic flavors and irresistible textures. You’ll find that every component, from the creamy ricotta to the mini chocolate chips, brings something important to the party.
- Unsalted butter (softened): Gives the cookie cups their rich, tender base and delicious flavor.
- Granulated sugar: Sweetens the dough just enough to balance the filling without overpowering it.
- Large egg: Adds structure and helps bind the dough together for perfect cups.
- Vanilla extract: Lends a warm, aromatic note to both the cookie and the filling.
- All-purpose flour: The backbone of the cookie cups, creating that classic chewy texture.
- Baking soda: Gives the cups a gentle lift and just the right amount of softness.
- Salt: Enhances every flavor and keeps the sweetness in check.
- Whole milk ricotta cheese (well-drained): The creamy heart of the cannoli filling—drain it well for the perfect texture.
- Mascarpone cheese: Adds silkiness and a subtle tang that’s pure Italian decadence.
- Powdered sugar: Sweetens the filling and creates that signature smoothness.
- Cinnamon: A hint of spice that makes the filling sing with warmth.
- Mini chocolate chips: Those delightful bursts of chocolate in every bite are absolutely essential.
- Optional garnish (extra mini chocolate chips & powdered sugar): For a bakery-worthy finish and a little extra flair.
How to Make Cannoli Cookie Cups
Step 1: Prep Your Oven and Pan
Start by preheating your oven to 350°F (175°C) and lightly greasing a mini muffin tin. This ensures your cookie cups pop out easily and bake evenly. Even if your pan is nonstick, a touch of grease makes all the difference in keeping those delicate cups intact.
Step 2: Make the Cookie Cup Dough
In a medium bowl, cream the softened butter and granulated sugar together until the mixture is light, fluffy, and almost cloud-like. Beat in the egg and vanilla extract, letting each ingredient fully incorporate for the best texture. In a separate bowl, whisk together the flour, baking soda, and salt, then gradually add these dry ingredients to your wet mixture. Mix until just combined—you want a soft, slightly sticky dough.
Step 3: Shape and Bake the Cups
Scoop about one tablespoon of dough into each well of your prepared mini muffin tin. Gently press the dough down and up the sides to form little cups—don’t worry if they’re not perfect! As they bake, the dough will puff slightly, so after 10–12 minutes in the oven (until golden), use the back of a spoon or a tart press to gently reshape the centers if needed. Let the cups cool in the pan for 10 minutes before transferring them to a wire rack to cool completely.
Step 4: Make the Cannoli Filling
In a bowl, beat together the well-drained ricotta, mascarpone, powdered sugar, vanilla, and cinnamon until the mixture is smooth and creamy. The secret here is making sure your ricotta is really well-drained—otherwise, the filling can be too loose. Once you have a dreamy, thick mixture, fold in the mini chocolate chips for bursts of chocolate in every bite.
Step 5: Fill and Garnish the Cannoli Cookie Cups
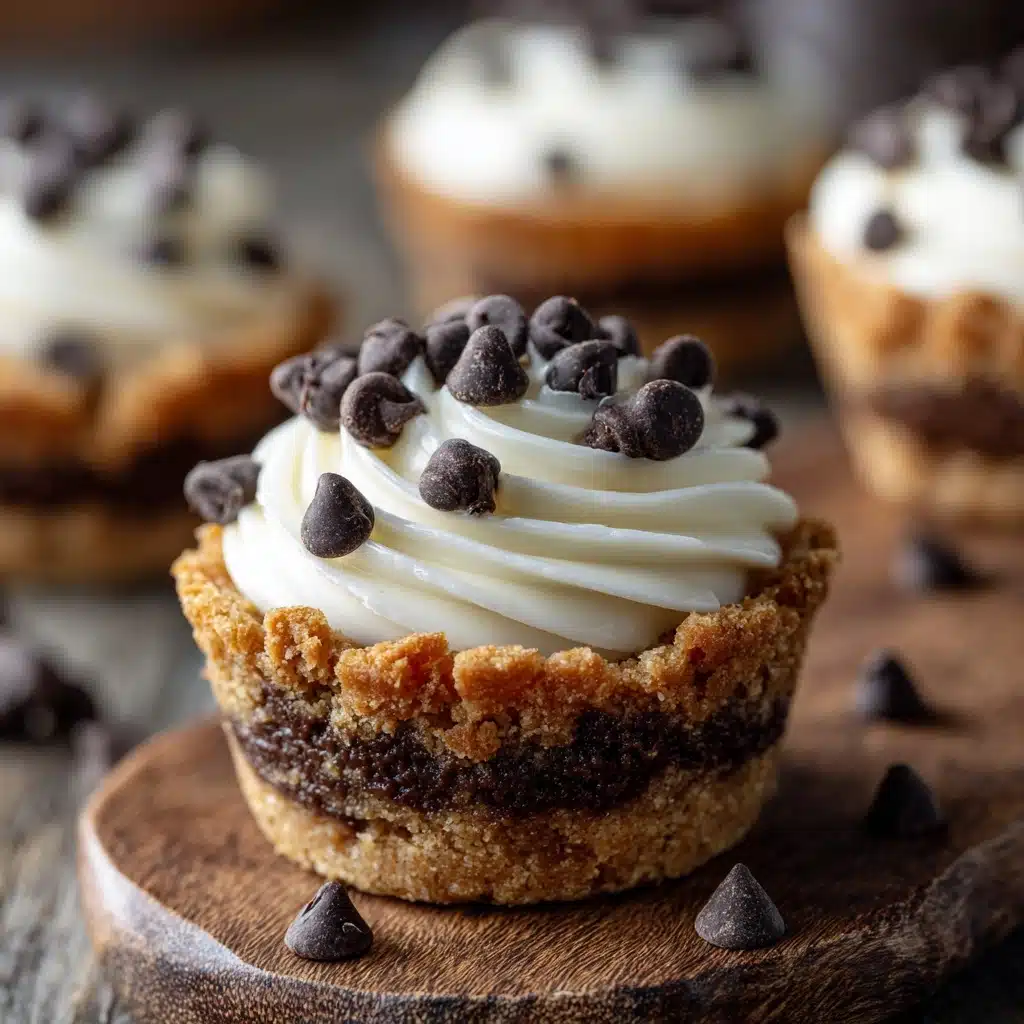
Once the cookie cups are completely cool, spoon or pipe the creamy filling into each cup. For that bakery-style finish, top with extra mini chocolate chips and a generous dusting of powdered sugar. The result is a tray of Cannoli Cookie Cups that look as fabulous as they taste!
How to Serve Cannoli Cookie Cups
Garnishes
Dress up your Cannoli Cookie Cups with a final flourish—extra mini chocolate chips and a snowy sprinkle of powdered sugar. A few curls of candied orange peel or a light dusting of cinnamon can add a pop of color and a nod to traditional cannoli, making your dessert tray absolutely irresistible.
Side Dishes
These cookie cups shine alongside a fresh fruit platter, a scoop of gelato, or even a simple espresso. Their creamy filling and crisp shell make them a perfect pairing with coffee or tea, balancing the sweetness and offering a touch of Italian café elegance at home.
Creative Ways to Present
Pile Cannoli Cookie Cups high on a tiered cake stand for a show-stopping dessert centerpiece, or tuck them into mini cupcake liners for easy, elegant serving at parties. For a playful twist, try arranging them on a rustic wooden board with bowls of extra toppings—let guests customize their own!
Make Ahead and Storage
Storing Leftovers
If you find yourself with leftover Cannoli Cookie Cups (lucky you!), store them in an airtight container in the refrigerator. The cookie shells will stay crisp for a day or two, and the filling keeps its creamy texture, making them just as delicious the next day.
Freezing
You can freeze the baked, unfilled cookie cups for up to one month—just let them thaw at room temperature before filling. The ricotta-mascarpone filling, however, is best made fresh, as freezing can affect its creamy texture.
Reheating
No need to reheat Cannoli Cookie Cups, as they’re meant to be enjoyed chilled or at room temperature. If you’ve stored the cookie shells separately, you can pop them in a low oven for a couple of minutes to refresh their crunch before filling.
FAQs
Can I use store-bought ricotta for the filling?
Absolutely! Just be sure to drain it thoroughly—store-bought ricotta often has extra moisture, so pressing it through a fine mesh sieve or cheesecloth helps keep your filling thick and luscious.
How far ahead can I make Cannoli Cookie Cups?
You can bake the cookie cups up to two days in advance and store them in an airtight container. Make the filling the day you plan to serve for the freshest flavor and texture, then assemble just before your guests arrive.
What if I don’t have a mini muffin tin?
No mini muffin tin? No problem! Try pressing the dough into silicone mini tart molds or even shaping small cups by hand on a baking sheet. Just keep an eye on the baking time, as thinner cups may bake faster.
Can I substitute cream cheese for mascarpone?
If mascarpone is hard to find, you can substitute full-fat cream cheese for a slightly tangier filling. The texture will still be smooth and creamy, though the flavor will be a touch different from classic cannoli.
Are Cannoli Cookie Cups gluten-free?
The traditional recipe uses all-purpose flour, but you can swap in a good-quality 1:1 gluten-free flour blend for equally tasty results. Just make sure all your other ingredients are gluten-free as well!
Final Thoughts
If you’re looking for a dessert that’s both impressive and easy enough for any day of the week, Cannoli Cookie Cups are your answer. They bring a taste of Italy to your table with every bite, and I promise—once you try them, you’ll want to make them for every gathering, big or small. Give this recipe a go, and let these little cookie cups steal the spotlight at your next celebration!
Print
Cannoli Cookie Cups Recipe
- Total Time: 37 minutes
- Yield: 24 cookie cups 1x
- Diet: Vegetarian
Description
These delightful Cannoli Cookie Cups are a perfect bite-sized twist on the classic Italian dessert. Featuring a buttery cookie cup filled with a creamy ricotta and mascarpone mixture studded with mini chocolate chips, they offer a deliciously rich and satisfying treat that’s easy to make and perfect for any occasion.
Ingredients
For the cookie cups:
- 1/2 cup unsalted butter (softened)
- 3/4 cup granulated sugar
- 1 large egg
- 1 teaspoon vanilla extract
- 1 1/4 cups all-purpose flour
- 1/2 teaspoon baking soda
- 1/4 teaspoon salt
For the cannoli filling:
- 1 cup whole milk ricotta cheese (well-drained)
- 1/2 cup mascarpone cheese
- 1/2 cup powdered sugar
- 1/2 teaspoon vanilla extract
- 1/4 teaspoon cinnamon
- 1/4 cup mini chocolate chips
Optional garnish:
- Extra mini chocolate chips
- Powdered sugar for dusting
Instructions
- Preheat and prepare: Preheat the oven to 350°F (175°C). Lightly grease a mini muffin tin to prevent sticking and ensure easy removal of the cookie cups.
- Make the dough: In a medium bowl, cream the softened butter and granulated sugar together until light and fluffy, which helps create a tender cookie. Beat in the egg and vanilla extract to combine. In a separate bowl, whisk together the all-purpose flour, baking soda, and salt. Gradually add the dry ingredients to the wet mixture, mixing until fully combined to form the cookie dough.
- Form cookie cups: Scoop about 1 tablespoon of dough into each mini muffin cup. Gently press the dough down and up the sides of each cup to shape it into a small cup, creating space for the filling later.
- Bake: Bake the cookie cups for 10–12 minutes until they turn lightly golden. Once out of the oven, immediately use the back of a spoon or a small tart press to gently reshape the center of each cookie, ensuring clear cup shapes. Allow the cookie cups to cool in the pan for 10 minutes before transferring them to a wire rack to cool completely.
- Prepare the filling: In a bowl, beat the well-drained ricotta cheese, mascarpone cheese, powdered sugar, vanilla extract, and cinnamon until the mixture is smooth and creamy. Stir in the mini chocolate chips to add texture and flavor.
- Fill the cookie cups: Spoon or pipe the creamy cannoli filling into each cooled cookie cup, filling them generously.
- Garnish and serve: Garnish with extra mini chocolate chips on top and dust lightly with powdered sugar for a beautiful presentation before serving.
Notes
- Ensure the ricotta cheese is thoroughly drained to avoid a watery filling which can affect texture.
- Chill the filling before piping to make it easier to manage and achieve clean, well-defined filling in each cookie cup.
- These cookie cups are best served the same day but can be refrigerated for up to 2 days.
- Use mini chocolate chips for optimal texture and size proportion in the filling and garnish.
- Prep Time: 25 minutes
- Cook Time: 12 minutes
- Category: Dessert
- Method: Baking
- Cuisine: Italian-American
Nutrition
- Serving Size: 1 cookie cup
- Calories: 140
- Sugar: 10g
- Sodium: 55mg
- Fat: 8g
- Saturated Fat: 5g
- Unsaturated Fat: 2g
- Trans Fat: 0g
- Carbohydrates: 14g
- Fiber: 0g
- Protein: 2g
- Cholesterol: 20mg
