
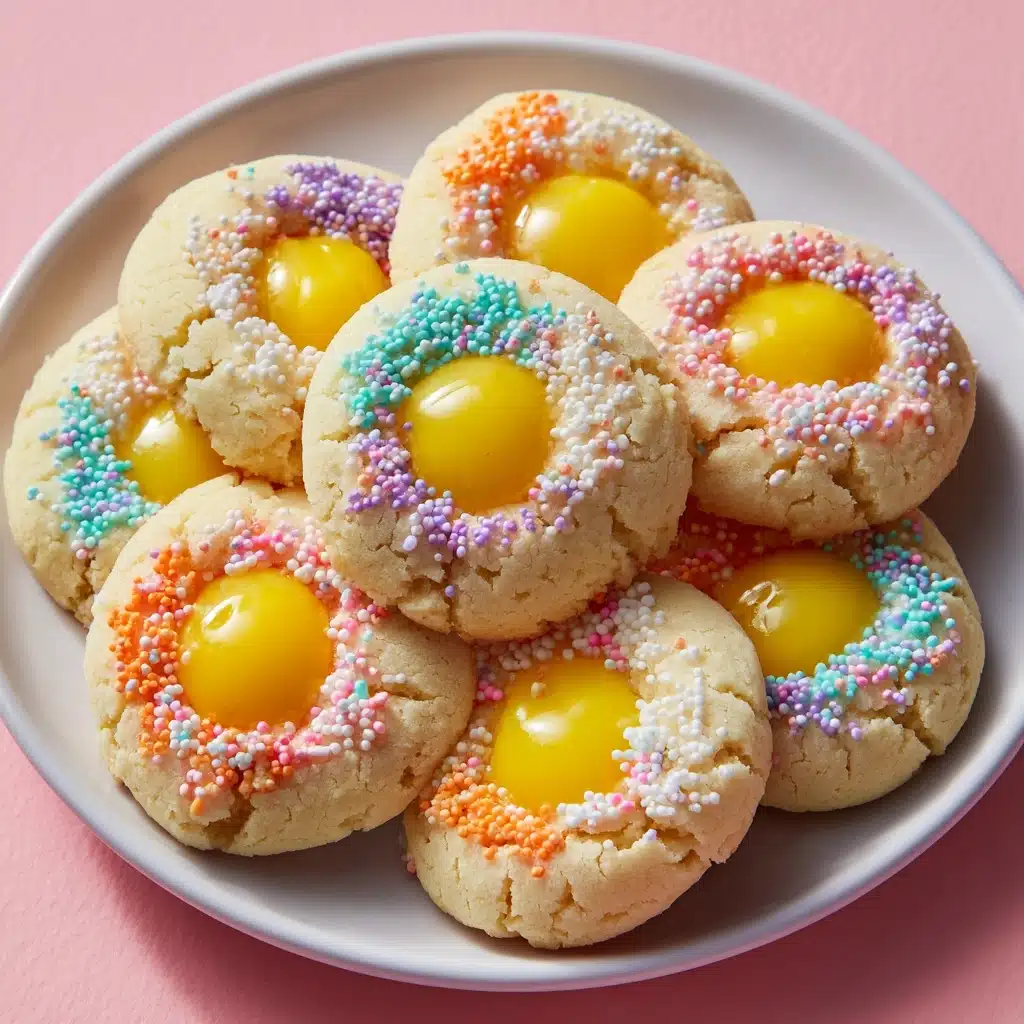
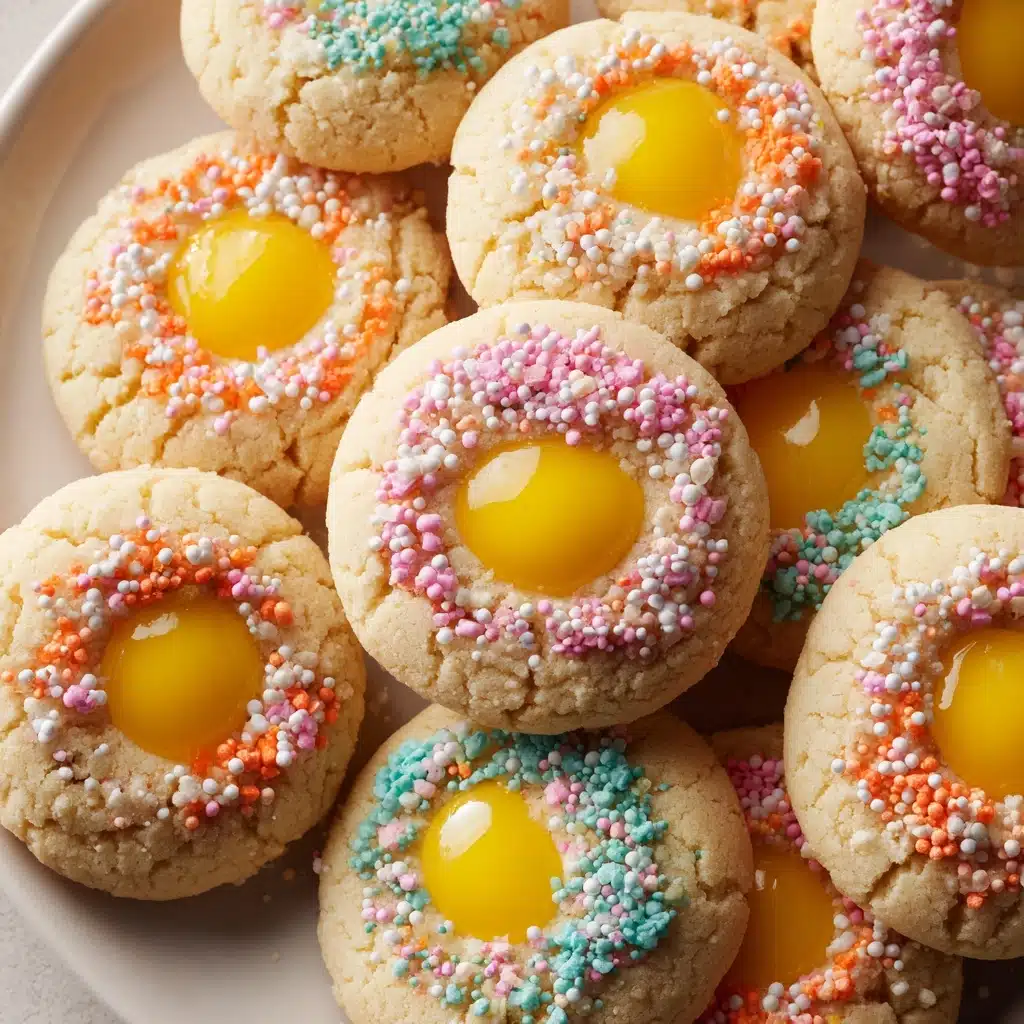
If you’re looking for the ultimate sweet treat to add color and joy to your celebration, look no further than Easter Thumbprint Cookies. These adorable, buttery morsels are rolled in cheerful pastel sprinkles or sanding sugar and filled with vibrant, jewel-toned jams or lemon curd. Their tender bite, burst of fruity flavor, and playful appearance make them irresistible for kids and adults alike. Whether you’re hosting a festive brunch or just love to bake something special for your loved ones, Easter Thumbprint Cookies are a holiday tradition you’ll want to revisit every spring.
Ingredients You’ll Need
Baking these cookies is refreshingly simple, and each ingredient serves a special purpose in achieving the perfect texture and festive flair. Here’s the lineup, along with why you’ll love every element:
- Unsalted butter (1 cup, softened): The key to a tender, melt-in-your-mouth cookie base—make sure it’s truly soft for easy creaming.
- Granulated sugar (⅔ cup): Sweetens the dough and helps create a classic, crisp edge.
- Large egg yolk (1): Adds richness and helps bind everything together, giving that distinctive thumbprint texture.
- Vanilla extract (1 teaspoon): Infuses a hint of warm, comforting flavor that makes the cookies sing.
- All-purpose flour (2 cups): Provides sturdy structure so your cookies hold their shape but remain tender.
- Salt (¼ teaspoon): Just enough to balance the sweetness and enhance all the other flavors.
- Easter sprinkles or pastel-colored sanding sugar (½ cup): The magic touch for a festive, sparkly finish—choose your favorite colors to match your table.
- Fruit jam or lemon curd (½ cup): For a pop of flavor and color—raspberry, apricot, or strawberry are especially pretty for Easter Thumbprint Cookies.
How to Make Easter Thumbprint Cookies
Step 1: Prepare Your Baking Sheet
Start by preheating your oven to 350°F (175°C) and lining a baking sheet with parchment paper. This little bit of prep means your cookies won’t stick and makes cleanup a breeze. Having everything ready ensures you can focus on the fun parts—rolling and filling those thumbprints!
Step 2: Cream the Butter and Sugar
In a large mixing bowl, beat together the softened butter and granulated sugar until the mixture is light and fluffy. This should take about 2 to 3 minutes and will set the stage for cookies that are soft, rich, and bake up perfectly every time. Don’t rush this part—it makes all the difference!
Step 3: Add Egg Yolk and Vanilla
Mix in the egg yolk and vanilla extract until well combined. The egg yolk gives the dough its luxurious texture, while the vanilla adds depth and that classic home-baked aroma you’ll dream about all day.
Step 4: Incorporate the Dry Ingredients
Add the flour and salt right into the bowl and mix until you have a soft, cohesive dough. It will seem a bit crumbly at first, but keep mixing until everything comes together—your patience will pay off when you start shaping those perfect balls.
Step 5: Shape and Decorate the Cookies
Scoop the dough by the tablespoon and roll each portion into a smooth ball. Now comes the festive part: roll each ball in your chosen Easter sprinkles or pastel-colored sanding sugar, pressing gently so they stick. You’ll love how quickly your baking tray transforms into a spring celebration!
Step 6: Make the Thumbprints and Fill
Place the sprinkled balls on the prepared sheet about 2 inches apart. Use your thumb or the back of a small spoon to press a gentle indent into the center of each. Spoon about ½ teaspoon of your favorite jam or some luscious lemon curd into each indent—no need to be perfectly tidy; the rustic look is part of the charm.
Step 7: Bake and Cool
Bake the cookies for 12 to 14 minutes, just until the edges are lightly golden. Let them rest on the baking sheet for five minutes before transferring to a wire rack. They’ll finish setting up as they cool, and the delightful aroma will draw everyone into your kitchen!
How to Serve Easter Thumbprint Cookies
Garnishes
Add extra joy by dusting the cooled cookies with a touch of powdered sugar or an extra sprinkle of your favorite pastel decorations. Fresh edible flowers or a few extra dots of jam on your platter can make them look like they hopped right out of a springtime storybook.
Side Dishes
Pair your Easter Thumbprint Cookies with a bright fruit salad, a refreshing pot of spring tea, or a glass of sparkling lemonade. Their sweet-tart jam filling and buttery crumb make them the perfect finisher after a savory brunch or a sweet companion to a coffee break.
Creative Ways to Present
Try piling your cookies onto a vintage cake stand, tucking them into Easter baskets, or arranging them in a color wheel pattern to show off their bright jam hues. You could even give each guest a cellophane bag tied with ribbon as a take-home treat—these cookies make wonderful edible favors.
Make Ahead and Storage
Storing Leftovers
Once baked and cooled, store your Easter Thumbprint Cookies in an airtight container at room temperature. They’ll stay tender and delicious for up to four days—if they last that long! Stack them between sheets of parchment paper to help preserve their pretty decorations and prevent sticking.
Freezing
If you’d like to bake ahead, simply prepare the dough balls, roll them in sugar or sprinkles, and flash freeze on a tray before transferring to a zip-top bag. When ready to enjoy, just thaw, make your indents, fill, and bake as directed. Baked cookies can be frozen, too; just thaw at room temperature for an instant treat.
Reheating
To bring out that fresh-baked flavor in leftover cookies, pop them in a 300°F (150°C) oven for just 2 to 3 minutes. This revives their crispy edges and slightly warms the jam center—just make sure to let them cool a bit before biting in!
FAQs
Can I use other types of sprinkles or sanding sugars?
Absolutely! Feel free to choose any sprinkles or sugars in colors you love or that match your celebration. Just remember that larger, chunky sprinkles might not adhere as smoothly, so look for fine sanding sugar or small confetti-style sprinkles for the best coverage.
Which jams taste best in Easter Thumbprint Cookies?
It’s completely up to you and your favorite flavors! Raspberry, apricot, and strawberry are especially festive, but lemon curd offers a tangy brightness that’s so refreshing. Mixing a few different jams in one batch makes your platter even prettier.
Can I make the dough in advance?
Yes! You can make the dough up to two days ahead. Store it tightly wrapped in the refrigerator until you’re ready to bake. Let it soften a touch at room temperature for easier rolling and shaping before continuing with the recipe.
How can I prevent the cookies from spreading too much?
If your dough is very soft or your kitchen is warm, pop the prepared balls (before baking) in the fridge for 10–15 minutes. This quick chill firms up the butter, which helps the cookies retain their adorable shape in the oven.
Are Easter Thumbprint Cookies suitable for gifting?
They’re perfect for gifting! Once fully cooled, they pack beautifully in tins or boxes—just separate layers with a sheet of wax or parchment paper. Their bright colors and cheerful shapes are sure to delight anyone lucky enough to receive them.
Final Thoughts
If you’re searching for a recipe that delivers both eye-catching beauty and melt-in-your-mouth goodness, Easter Thumbprint Cookies are a must-make this spring. Their festive look and sweet-tart flavors make every bite feel like a party, and the baking process is just as much fun as eating them. Give them a try and get ready to add a new favorite to your Easter traditions!
Print
Easter Thumbprint Cookies Recipe
- Total Time: 34 minutes
- Yield: 24 cookies 1x
- Diet: Vegetarian
Description
These Easter Thumbprint Cookies are a delightful addition to any springtime gathering. With a buttery cookie base filled with sweet jam or tangy lemon curd, and adorned with colorful Easter sprinkles, these treats are as festive as they are delicious.
Ingredients
Cookies:
- 1 cup unsalted butter (softened)
- ⅔ cup granulated sugar
- 1 large egg yolk
- 1 teaspoon vanilla extract
- 2 cups all-purpose flour
- ¼ teaspoon salt
Decorations:
- ½ cup Easter sprinkles or pastel-colored sanding sugar
- ½ cup fruit jam or lemon curd (such as raspberry, apricot, or strawberry)
Instructions
- Preheat Oven: Preheat your oven to 350°F (175°C) and line a baking sheet with parchment paper.
- Cream Butter and Sugar: In a large mixing bowl, cream together the butter and sugar until light and fluffy, about 2–3 minutes.
- Add Wet Ingredients: Mix in the egg yolk and vanilla extract until combined.
- Incorporate Dry Ingredients: Add the flour and salt, mix until a soft dough forms.
- Form and Decorate: Scoop dough into balls, roll in sprinkles, place on baking sheet, press indent, and fill with jam or lemon curd.
- Bake: Bake for 12–14 minutes until lightly golden.
- Cool and Serve: Let cookies cool on sheet for 5 minutes, then transfer to a wire rack to cool completely.
Notes
- Use different colors of jam or curd for a festive look.
- Store cookies in an airtight container at room temperature for up to 4 days.
- You can make the dough ahead and refrigerate for up to 2 days before baking.
- Prep Time: 20 minutes
- Cook Time: 14 minutes
- Category: Dessert
- Method: Baking
- Cuisine: American
Nutrition
- Serving Size: 1 cookie
- Calories: 120
- Sugar: 7g
- Sodium: 40mg
- Fat: 6g
- Saturated Fat: 4g
- Unsaturated Fat: 2g
- Trans Fat: 0g
- Carbohydrates: 15g
- Fiber: 0g
- Protein: 1g
- Cholesterol: 20mg


